Eclipse photography
Eclipse photography
Photographing a solar eclipse depends very much on what equipment you have and what you want to photograph. Ideally, you will need a camera with manual settings and a special solar filter, but memorable images can be obtained using a “point and shoot” automatic camera or a smartphone.
Photographing a Partial Solar Eclipse
Warning! When photographing the partial phases of a solar eclipse, it's never safe to look directly or through a camera viewfinder at the Sun, even when it's partly covered by the Moon. Always use proper filters for eye protection and camera equipment to avoid eye damage and damage to your camera. For more information see Eye Safety.
During the partial phases of the eclipse, for any image which includes the Sun, you must use a filter specially made for solar photography. This will be an ND5 filter which is a 100 000 x light reduction. These can be purchased from astronomy shops and suppliers. Camera stores generally don’t sell suitable solar filters. You can make your own safe solar filter, but you must buy and use certified solar film. Detailed instructions for making your own solar filters like this can be found at: https://joe-cali.com/eclipses/EQUIPMENT/solarfilters.html.
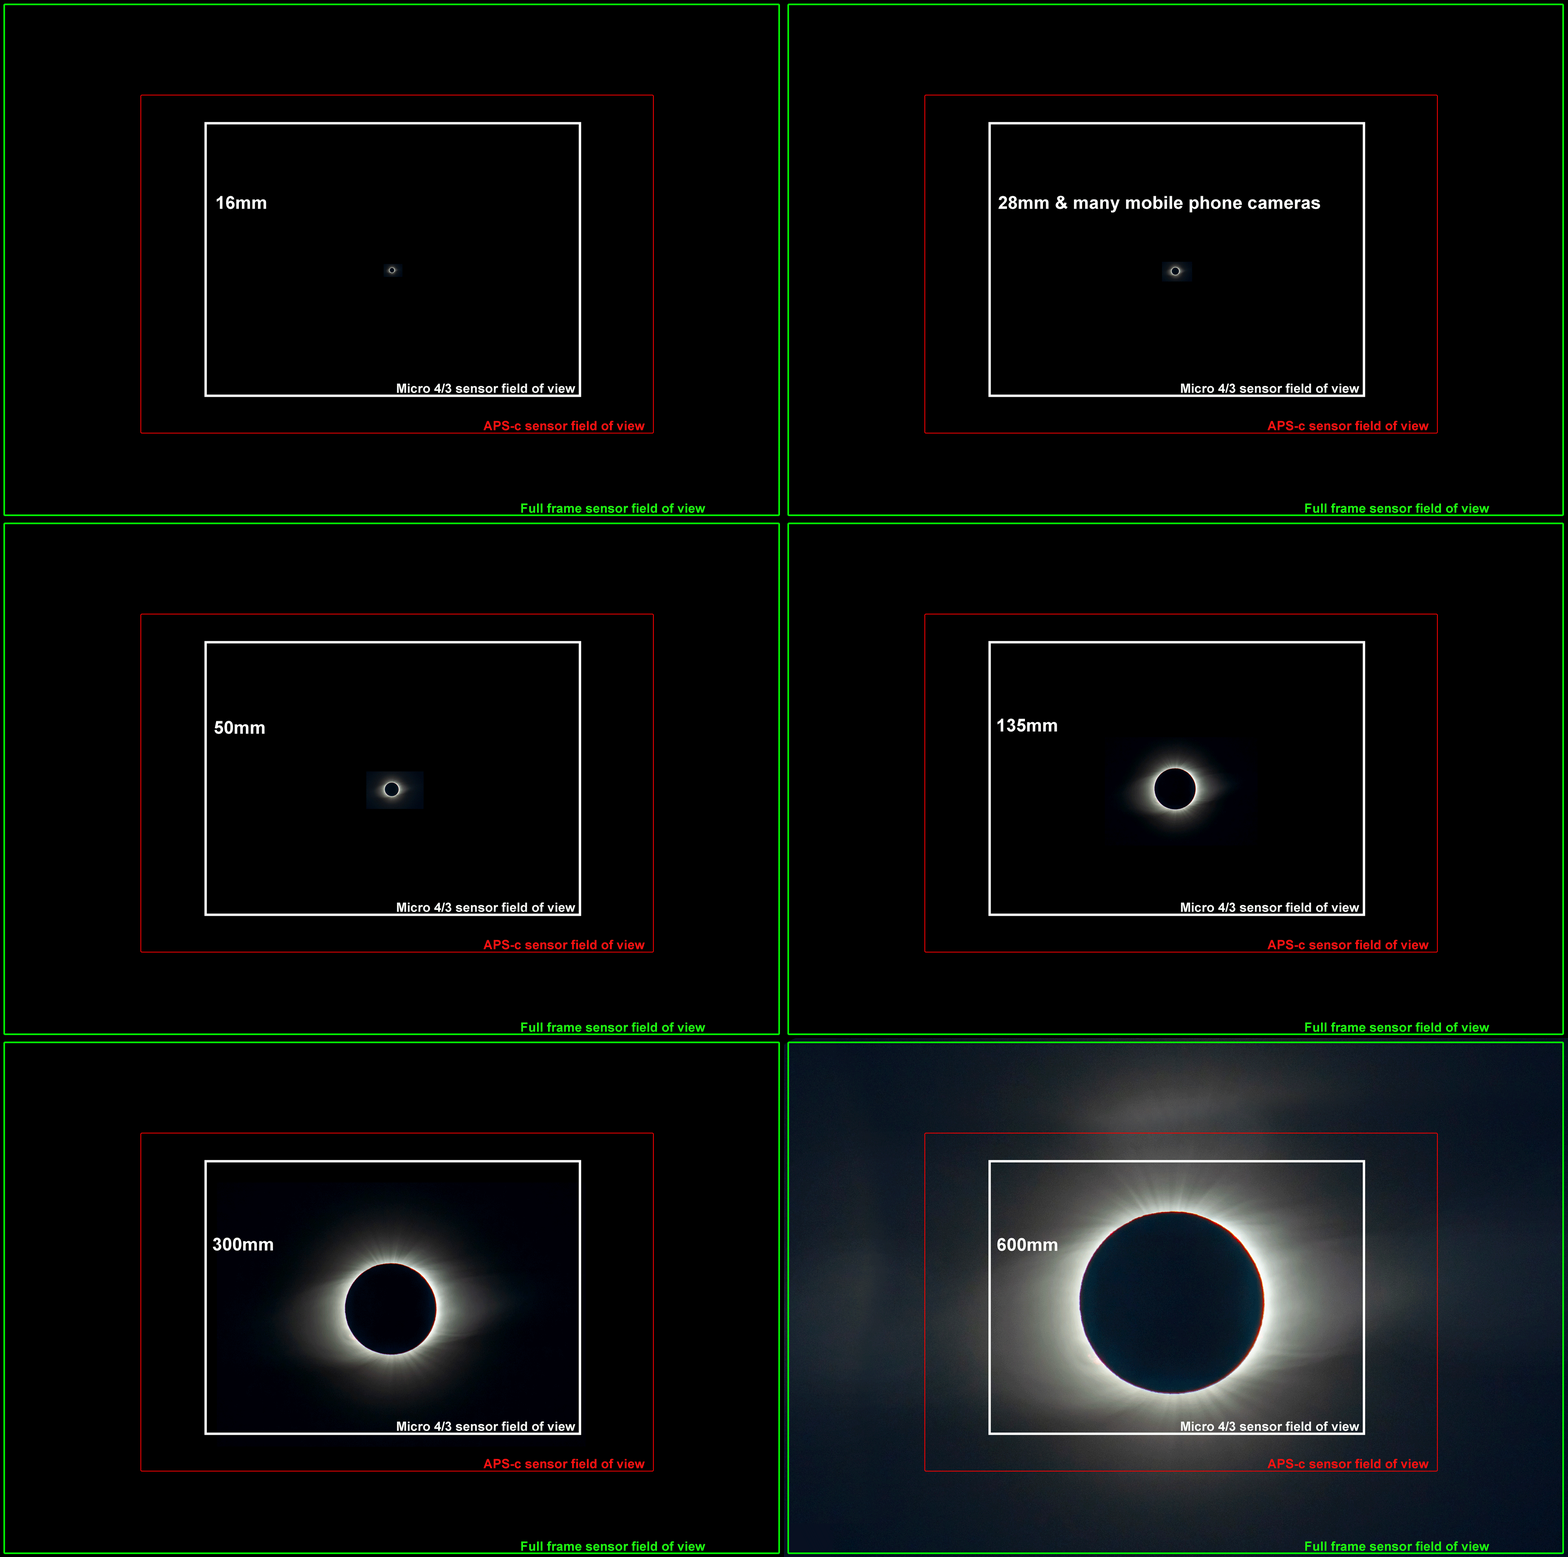
If you plan close up photos of the crescent Sun you will need a camera with manual control and a long telephoto lens, best mounted on a tripod or other stable surface. The animation of Figure 1 illustrates the image size of the Sun as the focal length of the lens is varied.
Attach the ND5 solar filter to the front of your lens to protect your camera and your eyes from the intense light of the Sun during the eclipse. The fitting needs to be very secure so that it can’t accidentally blow off, but also easy and quick to remove if you will also be photographing totality.
Adjust the tripod to frame the shot and focus on the Sun. If there are sunspots visible, these can assist focussing. Be prepared to move the aiming of the tripod as the Sun moves across the sky.
A suggested exposure setting is, with an aperture of around f5.6, a low ISO of around 100 to 200, set the shutter speed at about 1/500th of a second. If you are in an area where the Sun is reduced to a thin crescent as the eclipse progresses, you may need to increase the shutter speed to about 1/125th second. Periodically check images to assess the exposure and adjust as necessary.
If your camera is a point and shoot type or a smartphone, photos of the partial phase could include photos of projected images of the crescent Sun using pinhole, mirror, crossed fingers, or binocular projection, or under trees etc. See Eye Safety for details of projection methods. Photos of friends or relatives or crowds observing the eclipse, wearing eclipse glasses etc. can make for memorable photos. These photos can be made on an automatic setting, and do not require a solar filter, but be careful not to include the Sun in the image as this may damage the camera sensor and you will also need to protect your eyes if you do this.
Photographing the total phase of a Solar Eclipse
Photos of the total phase of the eclipse can be either wide angle or telephoto. Point and shoot cameras and smartphones can also produce good photos of the eclipse. No filter is necessary on the camera or for eye safety, but you must be sure you are in the correct location and time and only after totality has commenced when it suddenly gets very dark. Solar filters must be used immediately before and after totality. See Eye Safety for more information.
If you plan to photograph the Sun’s outer atmosphere (the corona) in detail, you will need a long telephoto lens. The animation of figure 1 illustrates the changing size of an eclipse image with focal length. Mount the camera on a tripod or other stable surface. Adjust the tripod to frame the shot with the Sun in the centre and focus on the Sun before totality (with the ND5 filter in place). If there are sunspots visible these can assist focussing. Be prepared to move the aiming of the tripod as the Sun moves across the sky.

During the total eclipse phase, the light level drops significantly. YOU MUST remove the solar filter no earlier than 15 seconds before totality and replace it no later than 15 seconds after totality.
A suggested starting exposure setting is, with an aperture of around f5.6, a low ISO of around 100 to 200 (to avoid noise), set the shutter speed at about 1/500th of a second. Conveniently, this is close to an exposure setting for the partial phase with the ND5 filter in place. Check your camera's live view or use the camera's LCD to check the focus, composition and exposure of the shot and make any necessary adjustments.
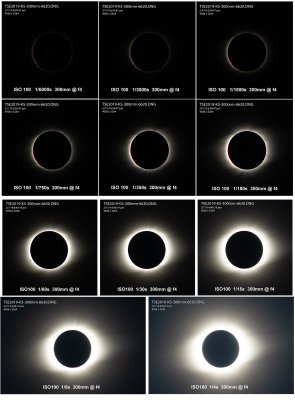
Experienced eclipse photographers take a very wide range of exposures to capture the intensity differences between the very bright inner corona, prominences, and diamond ring and the outer corona, some 10 000 to 15 000 times fainter. Typically using a telephoto lens or small telescope an image is taken at ISO100 and f5.6 at every shutter speed from 1/4000 sec to 1 sec. This requires a very dedicated and careful technique or computer control of the camera. After the eclipse, the exposures are combined into a high dynamic range (HDR) image.
Figure 2 below shows the extent of the corona recorded at a range of exposures during totality. This applies to any camera and lens, be it wide-angle, telephoto or a telescope. The image size will change with focal length, but the extent of corona measured relative to the diameter of the solar/lunar disc will remain approximately the same.

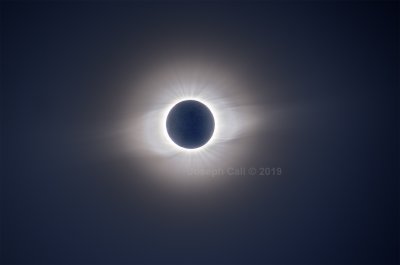
Figure 3 below is a composite image made up from 12 different exposures ranging from 1/1000 sec to 2 sec at f4 using a Pentax K5 DSLR, Pentax 300mmf4 EDIF lens at ISO100, and combined in Photoshop. Note the blue in the sky is beginning to show up, coronal streamers extend out to 7 solar radii past the limb of the Moon, and the cratered lunar surface, lit by light reflected off the Earth, is showing faintly.

It is possible to capture a moderate extent of corona by taking a single exposure of around 1/60 sec, f5.6, ISO100 and raw processing with highlights low and shadows high but results cannot match the result by using a full range of exposures.
With a wide-angle lens, you can capture the total eclipse, lunar shadow in the sky and some landscape but the fine details of the corona may be lost because the size of the Sun will be too small. You may need to vary the exposure to capture the full dynamic range of the scene so as not to overexpose the corona if it is included in the scene. It is also very important to remove a solar filter used during the partial phase at the start of totality and replace it at the end of totality. Suggested settings for wide angle photographs of the eclipse and landscape are to use any camera, set the ISO low for example 100 ISO, and manually set the exposure to around 1/60th sec at f4, mounted on a tripod or other stable surface.
For a point and shoot or smart phone camera, automatic setting will produce a reasonable image of the eclipse, but the corona may be overexposed.
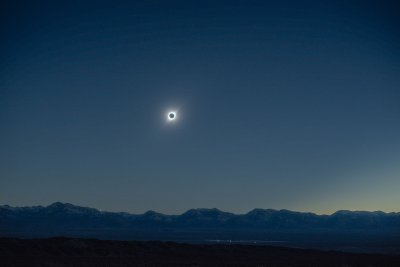
Figure 4 below is a wide-angle image of the eclipse of 2019 in South America showing both the total eclipse and landscape. It is captured as a single image at ISO100 and 1/125th sec at f2.8 with a 50mm lens. It has been raw developed with exposure, contrast, shadows, blacks, texture and clarity all up and highlights and dehaze both down. In the image the corona extends faintly to approximately 4 x the radius of the solar disc.

Some Final Points
Keep it simple and enjoy the experience. Experiencing a total solar eclipse with your own eyes is a very special experience. If this is your first eclipse don’t spend too much time fiddling with your camera or only looking at the eclipse through your camera viewfinder! Any camera or video will give some photographic record of the event. Do not buy new equipment just before the eclipse. Totality is not the time to be reading a camera manual.
Totality is short. Practice beforehand what you plan to do with your camera.
Bright camera/phone displays will reduce dark adaptation of your eyes & spoil your view and experience of totality. And turn off or tape over any flash.
Useful Reference websites
- Joe Cali Photographing Solar Eclipses: https://joe-cali.com/eclipses/ARTICLES/Eclipse-photography/index.html.
- Fred Espenak’s How to Photograph a Solar Eclipse: https://www.mreclipse.com/SEphoto/SEphoto.html.
- NASA Solar Eclipse Photography: https://eclipse.gsfc.nasa.gov/SEhelp/SEphoto.html.
- American Astronomical Society How to Shoot Solar Eclipse Images and Video: https://www.mreclipse.com/SEphoto/SEphoto.html.
